
Perhaps you’ve done thorough research and you know which type of storm shelter is the right fit for your home needs. You may have even decided which storm shelter company you’re going to buy from, or maybe you’ve even put down a deposit and you’re waiting for your shelter to be delivered and installed. There is still one important step that your storm shelter provider should assess and discuss: the storm shelter installation problems that can show up if the site isn’t fully evaluated ahead of time.
The purpose of this article isn’t to alarm you, but to help you identify potential obstacles before they become a problem, so you can be better prepared when your shelter is delivered and installed. You don’t want to run into storm shelter installation problems that cause the shelter to be delivered but not installed, leading to additional costs if the provider has to reschedule and return another day to complete the process.
Advance preparation is the key to ensuring a problem-free installation. Below are the most common site conditions that can stop an install outright or force a design or location change, organized by shelter type.
If you’re still exploring the question of whether you even need a storm shelter, or which type of shelter may be best for your home, my storm shelter buying guide will be a good place to start.
Applies To All Shelter Types
The following challenges can apply to any shelter type and installation location.
Permitting and Code Restrictions
Even if you’ve already chosen a shelter and a provider, local rules can still affect whether the install can happen as planned.
Some neighborhoods have HOA restrictions on where structures can be placed or what exterior changes are allowed. Other areas have zoning setbacks (minimum distance from property lines), historic district requirements, or special rules for floodplains.
Your installer may also be required to pull a permit, provide engineered drawings, or schedule inspections, especially for concrete work or anchoring.
The key is to confirm who is handling permits and what approvals are required before delivery day, so you don’t get stuck with a last-minute delay.
Underground Utilities or Easements
Underground hazards aren’t just a problem for backyard shelters. They can impact garage installs and above-ground anchoring too.
Gas, electric, water, sewer, fiber lines, and septic systems can run through areas you’d never expect, and utility easements may legally prevent excavation or anchoring even if the space looks perfect.
A professional installer should coordinate for utilities to be marked (commonly by calling 811 but the “811 Before You Dig” website will provide more details for your state) or confirm if it is your responsibility to do so. The installer should also confirm easements on your property survey when needed. Keep in mind this will not identify underground irrigation/sprinkler system lines.
If something is in the way, it doesn’t necessarily kill the install. However, it may force a different location, a different shelter orientation, or changes to the anchoring plan.
Access Constraints
A shelter install typically requires equipment and delivery access, and this is one of the most common “we can’t install today” problems.
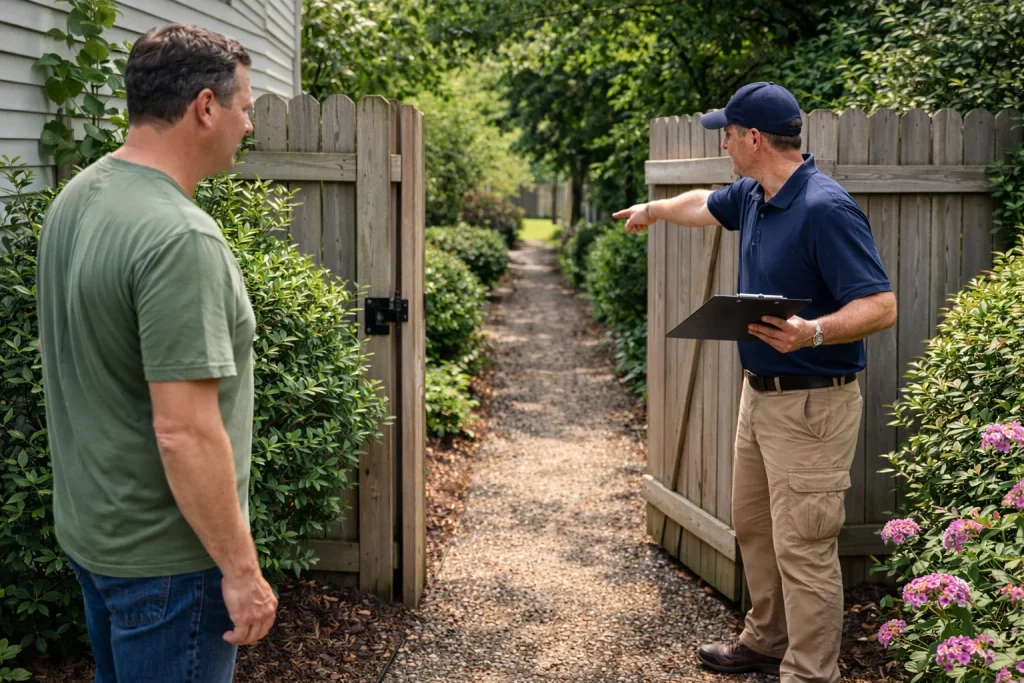
Your provider may need a clear path for a mini-excavator, skid steer, concrete truck, or the delivery trailer. Tight gates, narrow driveways, steep slopes, muddy/soft yards, or landscaping obstacles can stop equipment from reaching the site.
Overhead power lines can limit where a crane or boom truck can operate, and garage installs can be impacted by low garage door openings or tight interior turning space for moving the shelter into position.
A quick site walkthrough with your installer (or even photos/video ahead of time) can help you identify access issues early. Oftentimes, there are simple fixes like opening a wider gate path, choosing a firmer route, or adjusting the shelter location.
Above-Ground (Garage or Yard)
These installs are usually the most forgiving, but the concrete slab and space/clearances are everything.
Concrete slab issues are the most common problem. The garage floor may be too thin (less than 3.5 to 4 inches), cracked, or have insufficient reinforcement to properly anchor the shelter. Some older homes have slabs poured over dirt without rebar or wire mesh. The remedy is typically to cut out the existing slab section and pour a new reinforced pad to spec, or in some cases, use a larger anchor plate to distribute the load over a wider area.
Insufficient space and clearance comes up frequently. Homeowners underestimate how much room the shelter takes, especially once you account for the door swing, clearance around vehicles, and access to utilities like water heaters or breaker panels. The fix is usually downsizing the shelter model, repositioning it within the garage, or occasionally relocating utilities. Some homeowners end up choosing a different wall or corner than originally planned.
Utilities can be another obstacle. This includes gas lines, water lines, electrical conduits, or floor drains running through or near the installation footprint. These need to be identified before drilling anchor holes. A plumber or electrician may need to reroute lines, which adds cost and time. Ground-penetrating radar or simply knowing your home’s plumbing layout in advance helps avoid surprises.
Anchor bolt complications can arise when installers hit rebar, post-tension cables, or radiant heating lines while drilling. Post-tension slabs are a serious concern as cutting a cable can cause structural damage to the entire slab. The remedy is to identify post-tension slabs beforehand (look for stamps on the foundation, check building records, or ensure the provider uses ground-penetrating radar) and use alternative anchoring methods approved by the manufacturer.
Garage door clearance is sometimes overlooked. The shelter may block the garage door track, sensors, or the door’s range of motion. Repositioning the shelter or modifying the door track is the usual fix.
Underground (Garage)
These can be tricky because the installer is working inside an existing structure, cutting concrete, and removing whatever is beneath the concrete.
A high water table is probably the single biggest issue. If the water table is too high, the pit will flood during or after excavation, making installation difficult or impossible without waterproofing measures. Remedies include applying waterproof coatings, or in severe cases, abandoning the in-garage underground plan in favor of an above-ground unit.
Cutting a large section out of the garage floor can compromise the slab’s structural integrity, particularly if a cable is cut in a post-tension slab. As mentioned above in this article, it is important to identify post-tension slabs before the work begins.
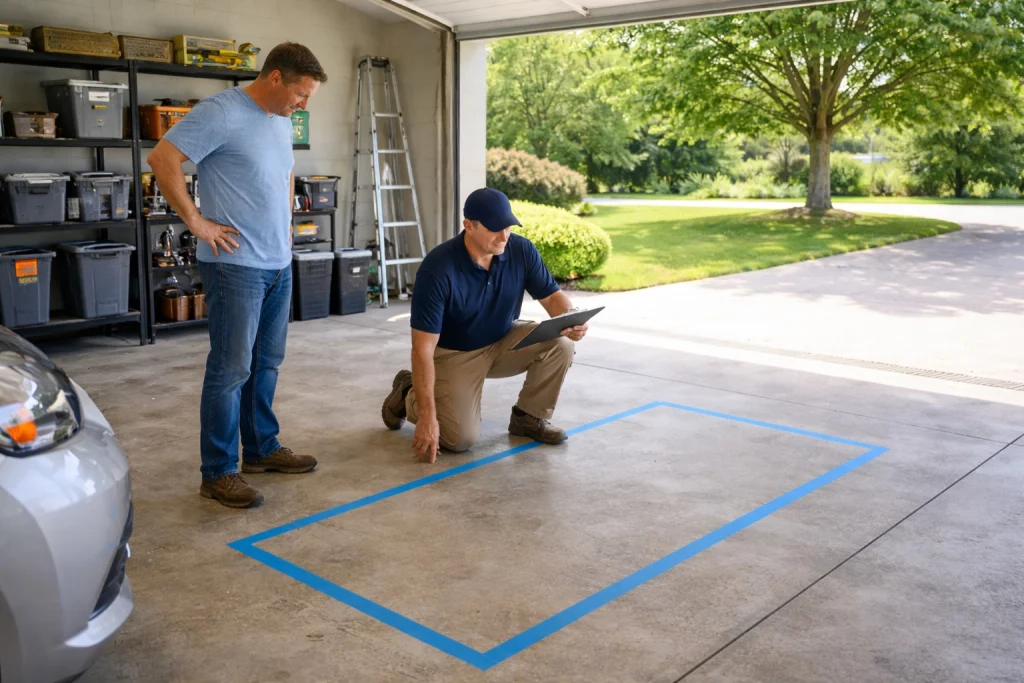
Utilities under the garage can be an obstacle that either requires rerouting the utilities or relocating the shelter. Typical utilities that may run under the garage include water, sewer, electrical, gas, radiant heat, or drain lines.
Soil conditions present challenges when installers encounter rock, caliche, heavy clay, or unstable fill material. Rock requires specialized cutting equipment (raising the cost significantly). Expansive clay soils can shift and put pressure on the shelter walls over time. Remedies include oversizing the excavation and backfilling with gravel or engineered fill, and installing proper drainage around the unit.
Excavation access is a practical headache. Getting a mini excavator or digging equipment into a garage can be difficult or impossible depending on the garage door size, driveway slope, and ceiling height. Hand-digging is an option but dramatically increases labor time and cost. Some installers use a compact track loader or even dig from outside and tunnel under the wall, though this is rare.
The finished installation needs to support a vehicle parked over or near the shelter lid. The lid and surrounding concrete must be engineered to handle the weight. Improperly finished installations can crack or settle over time. The remedy is ensuring the lid and surrounding slab are poured to the manufacturer’s load-bearing specifications.
Underground (Yard)
This is the most common underground scenario. A yard can hide surprises because the “best spot” on your property isn’t always the most suitable spot.
Local setback rules may require the shelter to be a certain distance from property lines, structures, or septic systems, and many lots have drainage easements, utility corridors, or right-of-way areas where excavation isn’t allowed. Even if the yard looks wide open, installing in one of these restricted zones can trigger permit issues, force relocation, or create future headaches if the utility company needs access. A reputable installer will verify setbacks with local code and confirm easements on your property survey (or county GIS) before finalizing the location.
Utility line strikes are a major concern. Underground electrical, gas, water, sewer, cable, and irrigation lines can all run through a yard. Calling 811 (or the local equivalent) for a utility locate is essential, but private lines (like sprinkler systems or septic lines) won’t be marked. Remedies include hand-digging in the vicinity of marked lines, repositioning the shelter, or having utilities professionally rerouted.
Major tree roots can stop an excavation quickly, especially from mature trees with wide root systems that extend well beyond the canopy. Cutting large roots can destabilize the tree (or kill it). Leaving roots in place can interfere with proper drainage around the shelter and can even lead to structural cracks and water intrusion. If roots are present, the safest solution is usually to shift the shelter location to avoid the root zone.

Drainage and flooding: a yard installation that sits in a low spot or lacks proper drainage may accumulate water inside the shelter. This is the number one long-term complaint from underground yard shelter owners. Solutions include installing French drains around the perimeter, grading the soil so it slopes away from the entrance, adding a sump pump, and ensuring the lid and entry point are elevated slightly above grade.
Soil and excavation problems mirror the garage underground issues. Rock, expansive clay, sandy soil that won’t hold the excavation walls, or hitting an unexpectedly high water table can present challenges. Soil testing beforehand helps, and the remedies are the same: engineered backfill, drainage systems, and potentially choosing a different location in the yard.
Access for equipment: the installation typically requires a crane or large excavator, which needs to get into the backyard. Fences, narrow side yards, overhead power lines, trees, and landscaping can all block access. Common remedies include temporarily removing fence sections, trimming trees, or coordinating with the power company to de-energize overhead lines. Some homeowners end up placing the shelter in the front yard instead.
Storm Shelter Installation Problems: Final Thoughts
With proper planning, most storm shelter installations go smoothly. The good news is that nearly all of the issues mentioned in this article can be identified early with a site walkthrough, a utility locate, and a clear plan for who is responsible for permits, engineering, and any prep work.
Before your shelter is delivered, ask your provider to confirm the exact location, access path for equipment, and any “go/no-go” factors that could trigger a delay or a design change. A few photos, a copy of your property survey (if you have one), and a quick conversation about drainage and utilities can prevent the most frustrating outcome: a shelter that arrives on time but can’t be installed.
If you could give one tip to a homeowner preparing for install day, what would it be? What other potential challenges need to be considered that aren’t covered in this article? Comment below or reach out to me directly.